Dripping Tap? How To Fix The Top 5 Tap Leaking Problems.
Posted by Lorraine on 17th Jan 2019

A tap is a necessity item in the home so it is important that your tap remains in good working condition. A leaky faucet is far from ideal, not only is it frustrating but if left untreated it can waste a significant amount of water. If you’re experiencing continual dripping or reduced water flow from your kitchen tap this could be due to a number of reasons, many of which can be fixed easily without the need to hire a plumber.
Generally speaking, there are three types of tap valve, it’s worth checking which kind of tap valve you have before you try to fix any leak yourself. If you can only rotate the handle through a quarter of a turn it will normally be a ceramic disc type of tap. Handles on rubber washer type designs can often be rotated a full turn or more. If you’re unsure about the type of valve you own take a look in your user manual;
Types of Tap Valves;
- Compression Valve - Older taps, often referred to as a compression washer tap, tend to use rubber washers.
- Ceramic Disc/Valve – Modern taps often feature ceramic washer mechanisms.
- Ceramic Cartridge – Similar to the ceramic discs but ceramic cartridges are designed specifically for single monobloc taps.

Why is my tap leaking? Here are 5 common reasons for a leaky tap;
Scratched Ceramic Discs.
The majority of modern taps now use ceramic disc cartridges as opposed to rubber washers to prevent dripping.
Ceramic disc taps feature a cartridge within the tap that contain a pair of ceramic discs. One of these discs remains in a constant fixed position and the other rotates when the handle is operated. Both of the ceramic discs feature two holes, when the tap lever is turned the moveable disc rotates and the holes align with the holes in the static disc to allow water to flow through, a turn in the opposite direction switches off the tap and will stop the water flow.
When you install a tap featuring ceramic disc technology it generally means you’ll be subject to fewer leaks, if any at all. If you do experience dripping this is usually caused by a scratched ceramic disc. In order to rectify the leak you must replace the entire cartridge as follows.
How To Replace A Tap Cartridge.
- Ensure the water supply is switched off at the mains or via an isolator valve before you start. Allow the water to run so the pipes are clear. Secure the plug into the sink hole to prevent any components falling down the plug hole.
- Lay the components out in the order in which you remove them, this will make re-assembly much easier for you!
- Remove the tap handles. Some models can be loosened by unscrewing the retaining screws that are concealed within the tap lever, others may need the cap top removing to gain access to the screws.
- Once the handles are removed the top of the valve will be visible. Using an adjustable spanner remove the valve cover.
- Carefully remove the ceramic cartridges, take note of which is for the hot tap and which is cold. Check both cartridges for dirt and damage.
- If the cartridges are dirty, wipe clean with a damp cloth and dry thoroughly. If the ceramic cartridges are worn, replace with identical parts suitable for the tap unit. Make sure the hot and cold cartridges are installed into the appropriate taps.
Ceramic taps can also drip at the base of the cartridge if the seal has perished. It is worthwhile taking the damaged cartridge with you when buying a replacement to ensure you purchase the correct replacements.

Dirt In The Cartridge.
A small number of people experience problems a few weeks after the installation of a new tap. A leaking tap that has been recently installed could be due to a chip in the cartridge caused by dirt in the water supply.
It is important that you always flush out the system BEFORE installing a new faucet, failure to do so could result in dirt and debris becoming lodged in the cartridge causing damage.
Corroded Valve Seat.
The valve seat is situated beneath the tap valve and is there to create a completely water tight seal. If your tap is quite old and has recently started to drip, you may be tempted to change the washer but it is worthwhile checking the condition of the valve seat too. A new washer will not be effective if the seat valve is not secure.
The valve seat is an essential part of the tap that can corrode and become rough or slightly worn over time. When it starts to deteriorate it will not create a secure seal and therefore water will escape, causing a leak. This part should be replaced to ensure a completely water tight seal.
Loose Or Damaged O Ring.
If your tap is leaking at the joint of the body, near the handle and spout, this could be due to a loose or damaged spout O ring.
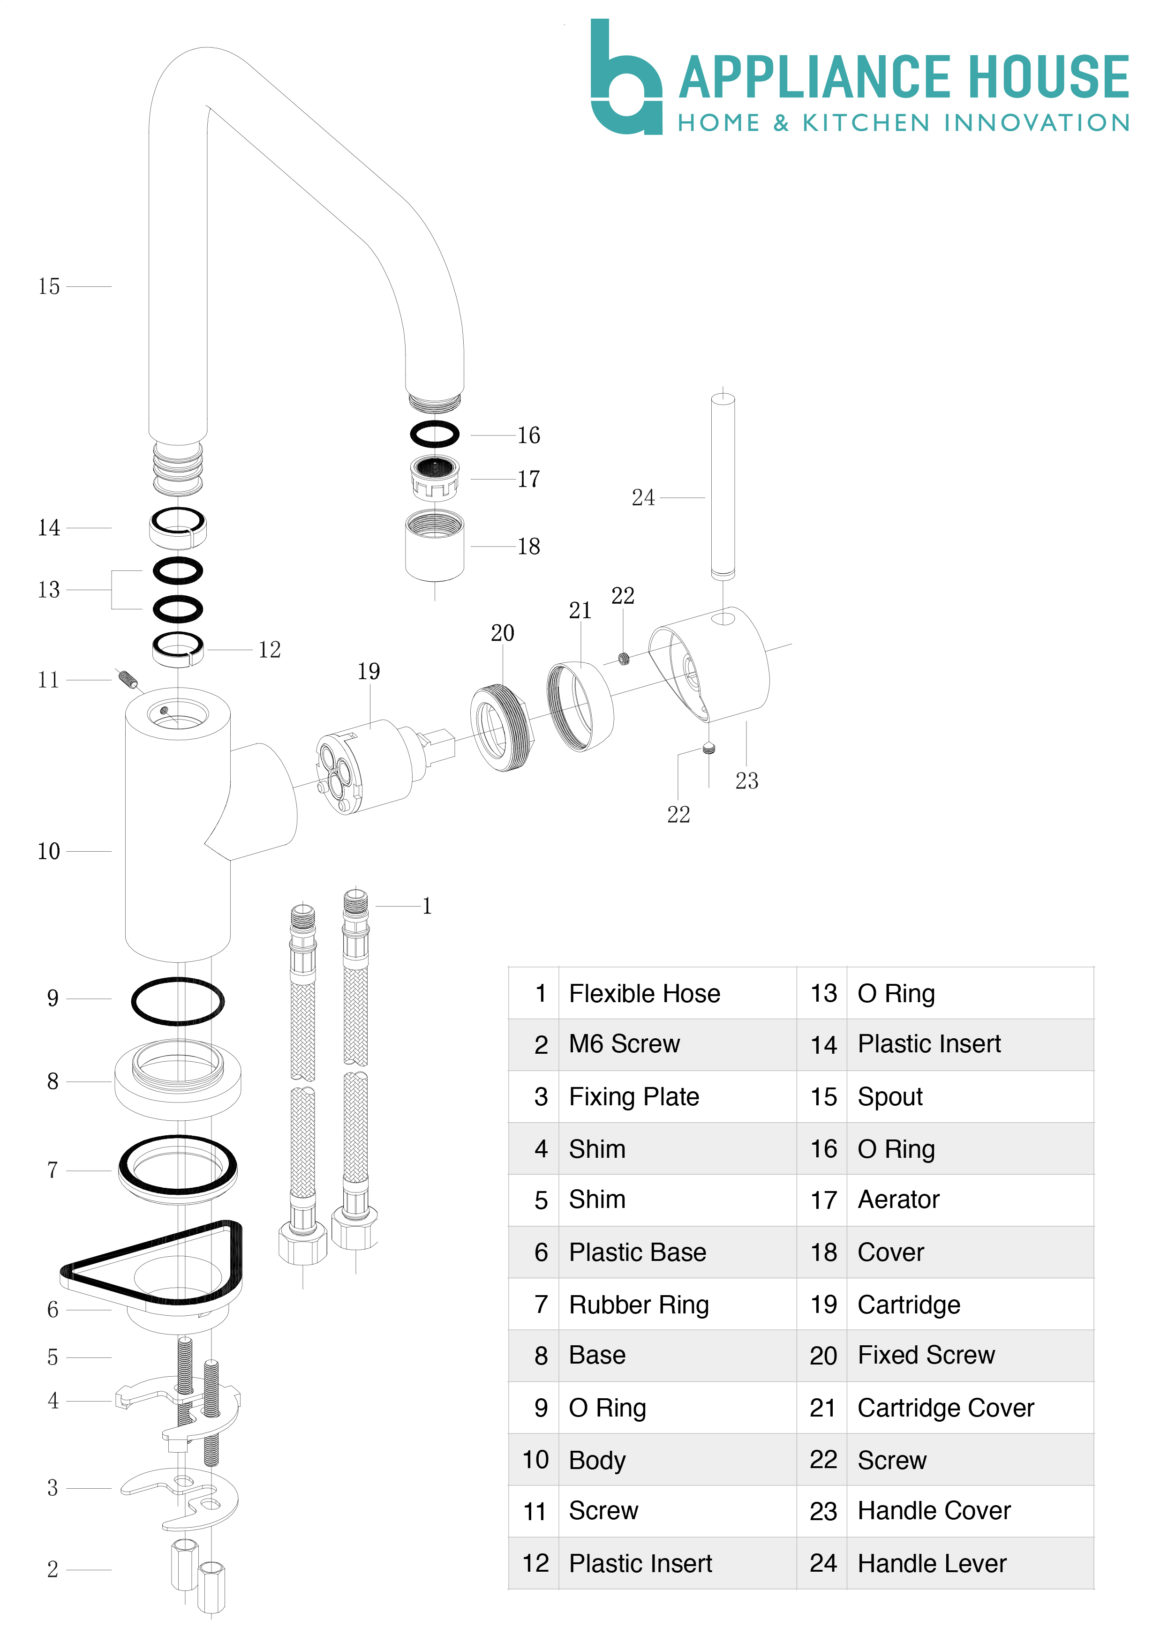
To replace an O-ring at the base of a spout you must remove the spout by loosening the grub screw which is usually located at the back of the tap. Once the spout is released, you can access the O-ring where you can remove the old, worn out o-ring and roll on a new replacement.
Worn Out Washer.
A leak caused by a worn out washer is one of the most common causes behind a dripping compression washer tap. When you switch on your tap the washer is forced against the valve seat, this constant pressure will eventually cause it to wear out which results in dripping around the spout. This can be rectified by replacing the washer. If the washer is not installed properly or the replacement washer is the incorrect size the leak will persist.
If you have persistent problems with your tap it is advisable to hire a professional plumber.
If your tap is beyond repair or in need of an upgrade, we sell an extensive range of taps at Appliance House including modern kitchen taps and traditional style taps. With single lever or dual lever designs on offer along with water filter taps and boiling hot water taps you are sure to find a kitchen tap to suit your needs.
Should you require any further assistance please contact one of our friendly team on 0330 002 0229, we're always happy to help.


